How to Cut Dog Nails – A Step-by-Step Guide
Explore our step-by-step guide on how to cut dog nails safely. Learn expert tips for a stress-free trimming experience at home.
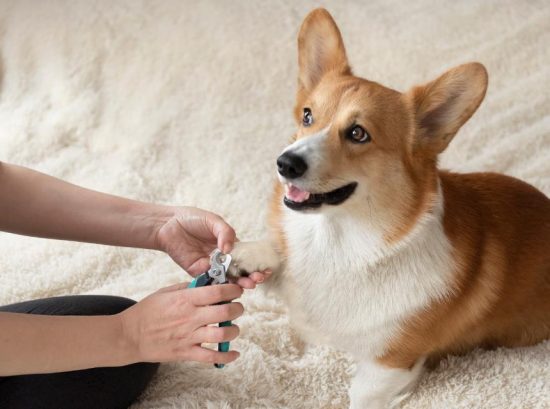
Have you ever wondered how to cut dog nails without causing stress or discomfort? Nail trimming is an important part of your dog’s grooming routine that contributes to their overall health and well-being. But the process can often be challenging, leaving both you and your furry friend feeling anxious.
So, how can you make nail trimming a stress-free experience for both you and your dog? In this step-by-step guide, we will provide you with the necessary instructions and tips to ensure a successful nail trimming session. From creating a calm environment to identifying your dog’s nail anatomy, we’ll cover everything you need to know to trim your dog’s nails confidently.
Get ready to discover the secrets to a stress-free and successful nail-trimming experience. Let’s embark on this grooming journey together and learn how to cut your dog’s nails like a pro!
The Importance of Regular Nail Trims for Your Dog
Regular nail trims are crucial for maintaining your dog’s overall health and comfort. Long nails can not only be uncomfortable for your furry friend but can also lead to various issues and potential injuries. By keeping your dog’s nails properly trimmed, you can ensure their well-being and prevent any unnecessary discomfort.
One of the main benefits of regular nail trims is the prevention of pain and difficulty walking. Overgrown nails can exert pressure on the toe joints, causing discomfort and making it challenging for your dog to walk or run comfortably. By maintaining the proper nail length, you can help your dog move freely and without pain.
Another advantage of regular nail trims is the prevention of injuries. Long nails are more prone to getting caught in carpets, furniture, or other objects, leading to painful accidents. Trimming your dog’s nails reduces the risk of nails breaking or tearing, preventing pain and potential infections. Proper nail hygiene is also essential in preventing the nails from curling and growing into the paw pads. This condition, known as ingrown nails, can be extremely painful and may require veterinary attention. By regularly trimming your dog’s nails, you can avoid this painful problem altogether.
In addition to the physical benefits, regular nail trims can also positively impact your dog’s behavior and overall well-being. Long nails can cause discomfort and even make your dog feel irritable. Keeping their nails at the proper length can help your dog feel more relaxed and content.
Now that you understand the importance of regular nail trims for your dog, it’s time to learn how to prepare your dog for a nail trimming session. Creating a calm environment, associating nail trimming with positivity, and choosing the right time for the session are some of the essential steps to ensure a successful and stress-free experience. Read on to the next section to explore these topics in more detail.
Preparing Your Dog for Their Nail Trimming Session
Before starting the nail trimming process, it’s important to prepare your dog and create a calm environment. Following a few simple steps can help ensure a positive experience for you and your dog.
Creating a Calm Environment
Find a quiet and comfortable space where you can trim your dog’s nails without distractions. This could be a well-lit room or a familiar location where your dog feels relaxed. Remove any objects that may cause anxiety or obstacles that could get in the way.
To create a calm environment, consider playing soft, soothing music or using a white noise machine. This can help drown out any external sounds that may startle your dog. Additionally, make sure there are no other pets or young children present during the nail trimming session to minimize distractions.
Remember to use gentle, reassuring words and maintain a relaxed posture to help keep your dog calm. Offering treats or rewards throughout the process can also create a positive association with nail trimming.
Associating Nail Trimming with Positivity
Building a positive association with nail trimming can go a long way in making the experience more enjoyable for your dog. Start by introducing your dog to the nail clippers or grinder gradually, allowing them to sniff and explore the tools at their own pace.
Offering treats and praise before, during, and after each nail trimming session can help create a sense of reward and positivity. You can also pair the nail trimming session with a favorite activity or toy to further reinforce the positive association.
Choosing the Right Time
Timing is an important factor when it comes to nail trimming. It’s best to choose a time when your dog is relaxed and less likely to be easily distracted or anxious. For many dogs, this may be after a meal or a play session when they are feeling tired and content.
Avoid scheduling the nail trimming session when your dog is already stressed or agitated. Pay attention to their body language and wait for a time when they seem calm and receptive. By choosing the right time, you can help ensure a smoother and more successful nail trimming experience.
| Calm Environment Checklist | Associating Positivity Checklist | Choosing the Right Time Checklist |
|---|---|---|
| Create a quiet and comfortable space for nail trimming | Gradually introduce your dog to the nail clippers or grinder | Choose a time when your dog is relaxed and less distracted |
| Remove any potential distractions or stressors | Offer treats and praise throughout the nail trimming session | Avoid scheduling the session during times of stress or agitation |
| Use soft, soothing music or white noise to create a calm atmosphere | Pair the nail trimming session with a favorite activity or toy | Pay attention to your dog’s body language and choose a time when they seem calm |
Identifying Your Dog’s Nail Anatomy
Before proceeding with nail trimming, it is important to understand the anatomy of your dog’s nails. This will help you make informed decisions and ensure a safe and comfortable nail trimming experience for your furry friend. Let’s take a closer look at the different parts of a dog’s nail:
- The Quick: The quick is the living part of the nail that contains blood vessels and nerves. It appears as a pink or red area within the nail. It is essential to avoid cutting the quick while trimming your dog’s nails, as it can cause bleeding and discomfort.
- The Nail Bed: The nail bed is the area beneath the nail plate. It supports the nail and provides nourishment to the growing nail cells.
- The Outer Shell: The outer shell is the hard, protective covering of the nail. It is made of keratin and helps to maintain the shape and structure of the nail.
To visualize the different parts of a dog’s nail, refer to the image below:
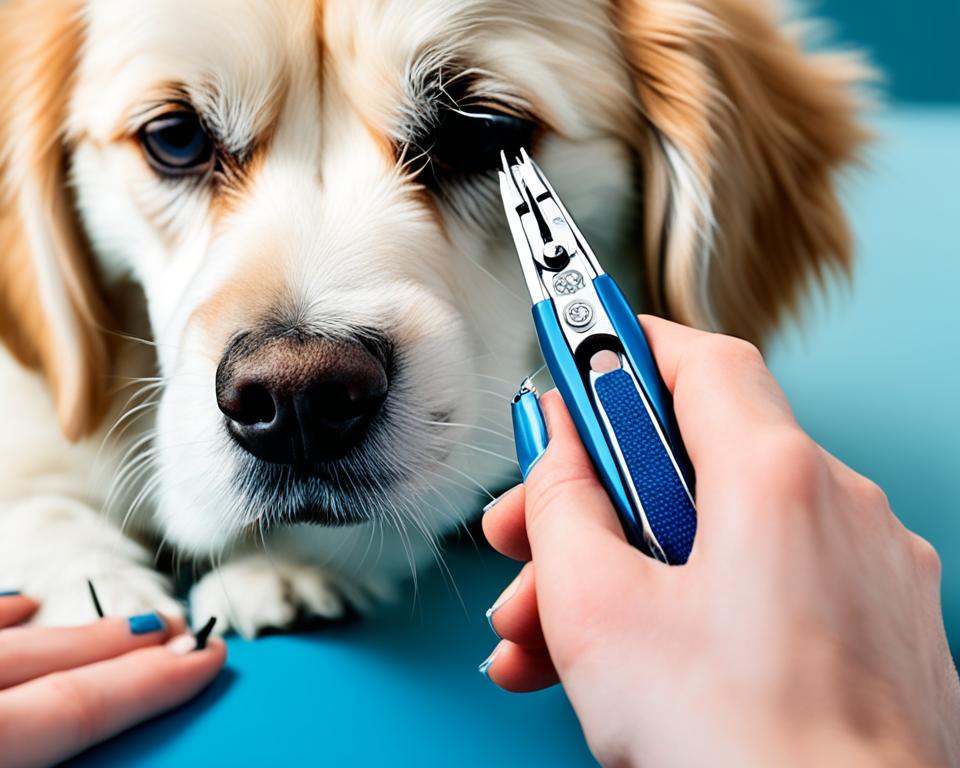
Essential Tools for Trimming Your Dog’s Nails

Having the right tools for nail trimming is crucial. Proper tools not only make the process easier and more efficient but also ensure the safety and comfort of your dog. In this section, we will discuss the different types of dog nail clippers, the use of nail grinders, how to trim dog nails and the importance of styptic powder for controlling bleeding.
Types of Dog Nail Clippers
When it comes to trimming your dog’s nails, there are various types of nail clippers to choose from. Selecting the right type depends on your dog’s size, comfort level, and the thickness of their nails. Here are some commonly used dog nail clippers:
- Guillotine-style clippers: These clippers have a hole where you insert your dog’s nail, and a blade that moves up to cut the nail.
- Scissor-style clippers: These clippers resemble a pair of scissors and are suitable for dogs with thinner nails.
- Grinder-type clippers: These clippers use a rotating grinding wheel to gradually shorten the nail. They are ideal for dogs who are anxious or fearful of the sound of traditional clippers.
Using a Nail Grinder
A nail grinder is an alternative tool to traditional clippers. It consists of a rotating emery board or grinding stone that files down the nail gradually. Nail grinders are particularly useful for dogs with thick or hard nails, as they offer more control and prevent over-cutting. They also help smooth the edges of the nails, reducing the chances of scratches and snags.
Styptic Powder and Its Uses
Accidental bleeding can occur during nail trimming, especially if the quick (the sensitive part containing blood vessels) is cut. To stop bleeding quickly and effectively, styptic powder is an essential tool to have on hand. Styptic powder contains ingredients that help coagulate blood and seal the wound. Simply apply a small amount of styptic powder to the bleeding nail to stop the bleeding.
It’s important to note that the use of styptic powder may cause a stinging sensation for your dog, so ensure to provide them with comfort and reassurance during and after the application.
| Type of Clipper | Best for | Pros | Cons |
|---|---|---|---|
| Guillotine-style clippers | Small to medium-sized dogs | Easy to use and control, precise cuts | May be uncomfortable for dogs with thicker nails |
| Scissor-style clippers | Small dogs with thin nails | Compact size, ideal for precise trimming | May not be suitable for larger dogs or thicker nails |
| Grinder-type clippers | Anxious or fearful dogs, dogs with thick nails | Allows for gradual nail shortening, reduces risk of over-cutting | Requires patience and longer trimming time |
Getting Comfortable with Paw Handling
Before you can start trimming your dog’s nails, it’s important to get them comfortable with paw handling. Dogs can be sensitive about their paws, so taking the time to build trust and create positive associations is key. Here are some techniques to help you get started:
One effective way to get your dog comfortable with paw handling is to introduce gentle paw massages. Start by gently holding your dog’s paw and using your thumb to apply light pressure to their pads and between the toes. Gradually increase the pressure as your dog becomes more comfortable. This not only helps them relax but also gets them used to the sensation of having their paws touched.
Handling Paws Regularly
Consistent and regular handling of your dog’s paws is crucial to desensitize them and build their tolerance. Take a few minutes each day to touch and hold their paws, making sure to check for any cuts, injuries, or irregularities. Use positive reinforcement, such as treats and praise, to reward your dog for allowing you to handle their paws. Over time, they will associate these interactions with positive experiences and become more comfortable.
Introducing Nail Clippers Gradually
When it’s time to introduce nail clippers, it’s important to do so gradually. Start by simply showing your dog the clippers and rewarding them with treats and praise. Once they are comfortable with the sight of the clippers, you can touch their paws with the clippers without actually trimming their nails. This helps them become familiar with the tool and reduces the likelihood of fear or anxiety during the actual trimming process.
How to Cut Dog Nails?
Properly cutting your dog’s nails is crucial for their comfort and overall well-being. Follow this step-by-step guide to ensure a safe and successful nail trimming session.
Before you begin, gather all the necessary tools, including a pair of dog nail clippers, a styptic powder in case of any bleeding, and treats as rewards for your dog’s good behavior.
Step 1: Prepare Your Dog
Start by creating a calm environment for your dog. Choose a quiet and comfortable space where you can both relax during the grooming session. If your dog is particularly anxious, you can try using calming techniques such as massage or aromatherapy to help them relax.
Step 2: Set up Proper Holding Position
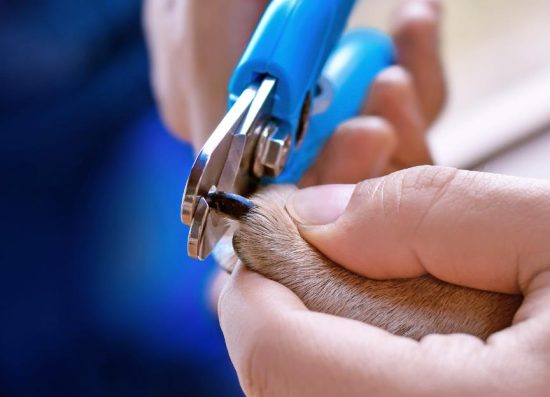
Hold your dog’s paw gently but firmly, ensuring you have a good grip. It’s important to avoid squeezing too tight to prevent any discomfort or injury. If you are right-handed, hold the clippers in your right hand and the paw in your left hand (and vice versa for left-handed individuals).
Examine your dog’s nail carefully and locate the quick, which is the sensitive part containing blood vessels and nerves. Be cautious not to cut into the quick as it could cause bleeding and pain. For dogs with light-colored nails, the quick is often visible as a pinkish area. If your dog has dark-colored nails, it may be more challenging to identify the quick. In such cases, make small cuts gradually, taking care not to go too far.
Step 4: Make Clean Cuts
Trim a small portion of the nail at a time, cutting straight across. Avoid angling the clippers, as this can increase the risk of splitting the nail or cutting too close to the quick. If your dog has long nails, you may need to make multiple cuts until you reach an appropriate length.
Step 5: Observe for Signs of Discomfort
While trimming your dog’s nails, pay attention to their body language and any signs of discomfort. If your dog becomes excessively anxious or shows signs of pain, it’s important to stop and take a break. You can always resume the nail trimming session when your dog feels more at ease.
Step 6: Reward Your Dog
After a successful nail trimming session, reward your dog for their cooperation and good behavior. Give them treats and praise to reinforce positive associations with nail trimming. This will help make future sessions more enjoyable for both of you.
Remember, practice makes perfect. With time and patience, you will become more confident in trimming your dog’s nails. If you are unsure or uncomfortable with performing the task yourself, consult a professional groomer or your veterinarian for assistance.
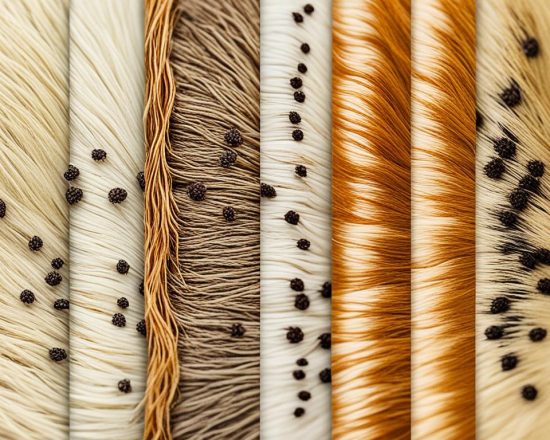
Trimming White vs. Dark Dog Nails
Trimming your dog’s nails requires different approaches depending on the color of their nails. White nails and dark nails each have their own challenges and considerations. In this section, we will provide you with guidance on how to trim both white and dark dog nails effectively.
Visual Cues on White Nails
When trimming white dog nails, the translucent nature of the nail makes it easier to identify the quick, the sensitive part that should be avoided. Look for the pinkish area within the nail known as the quick. This is a visual cue that indicates how far back you should trim. Be cautious when trimming white nails to prevent cutting into the quick and causing bleeding.
Guidance for Trimming Dark Nails
Trimming dark dog nails can be more challenging because it’s harder to see the quick. One approach is to make small, gradual trims to avoid cutting too much at once. Look for the spot where the nail starts to curve downward and trim just before that point. By trimming incrementally, you can avoid cutting into the quick. If you’re unsure, it’s always better to err on the side of caution and trim less rather than risk cutting into the sensitive area.
How to Avoid the Quick
Whether you’re trimming white or dark dog nails, it’s important to take precautions to avoid cutting into the quick. One way to minimize the risk is to use sharp, high-quality nail clippers or a nail grinder. Dull clippers can crush the nail, increasing the likelihood of cutting into the quick. Additionally, if you’re uncertain about the proper technique or if your dog has particularly long or curved nails, it’s advisable to consult a professional groomer or veterinarian who can provide guidance and support.
What to Do If You Cut the Quick
Accidentally cutting the quick while trimming your dog’s nails can happen even to the most experienced pet owners. It can be a stressful situation for both you and your furry friend. However, there are steps you can take to handle the situation calmly and ensure your dog’s comfort and safety.
Steps to Stop the Bleeding
If you accidentally cut the quick and your dog’s nail starts to bleed, remain calm and follow these steps:
- Gently apply pressure to the bleeding nail with a clean cloth or gauze. Maintain consistent pressure for a few minutes until the bleeding subsides.
- Alternatively, you can use styptic powder or a styptic pencil to stop the bleeding. Apply a small amount directly to the bleeding nail, following the product’s instructions.
- If the bleeding doesn’t stop or persists after applying pressure or styptic powder, contact your veterinarian for further guidance.
Comforting Your Dog After an Accident
After you’ve addressed the bleeding, it’s important to comfort your dog and make them feel safe. Here are some tips to help your dog recover and build trust:
- Create a calm and soothing environment by providing a quiet space for your dog to relax.
- Speak in a gentle tone and offer verbal reassurance to help calm your dog’s nerves.
- Engage in activities your dog enjoys, such as playing with their favorite toy or going for a walk, to distract them from the incident.
- Monitor your dog’s behavior closely and address any signs of discomfort or pain promptly.
Prevention Tips for Future Trims
To prevent accidental quick cuts during future nail trims, consider the following tips:
- Take your time and be cautious when trimming your dog’s nails. It’s better to trim a small amount gradually than risk cutting too much.
- Use a high-quality, sharp nail trimmer designed specifically for dogs. Dull or inappropriate tools can increase the likelihood of quick cuts.
- Identify the location of the quick before trimming by using a flashlight to visualize the blood vessel inside the nail. This will help you determine how much nail to trim.
- Consider enlisting the help of a professional groomer or veterinarian if you’re unsure about trimming your dog’s nails yourself.
| Prevention Tips | Description |
|---|---|
| Take your time | Trim nails gradually to avoid cutting the quick |
| Use the right tools | Invest in high-quality, sharp nail trimmers |
| Locate the quick | Use a flashlight to visualize the blood vessel before trimming |
| Consider professional help | If unsure, seek assistance from a groomer or veterinarian |
Aftercare Post Nail Trimming
Proper aftercare is essential to ensure your dog’s comfort and well-being after trimming its nails. This section will guide you through the post-nail trimming process, detailing the steps to follow for effective aftercare.
Once you have finished trimming your dog’s nails, it is important to check for any signs of discomfort or irritation. Inspect the nail beds and surrounding areas for redness, swelling, or bleeding. If you notice any abnormalities, apply gentle pressure to stop the bleeding and clean the area with a mild antiseptic solution. Consult your veterinarian if the discomfort persists or worsens.
Monitoring Your Dog’s Behavior
Keep a close eye on your dog’s behavior after nail trimming. If you notice any changes in their walking pattern, such as limping or favoring one paw, it could indicate discomfort or pain. Additionally, observe their behavior during daily activities and interaction with you. Unusual restlessness, decreased activity, or reluctance to engage in activities may signal discomfort or stress. If these behaviors persist, consult your veterinarian for further evaluation.
Rewarding Your Dog for Good Behavior
Positive reinforcement is key to fostering good behavior during and after nail trimming sessions. After each successful nail trimming, reward your dog with praise, treats, or their favorite toy. This association with positive experiences will help them feel more comfortable and cooperative during future nail trims. Remember to always reward good behavior and provide a calm and nurturing environment to reduce stress and anxiety.
Implementing proper aftercare is crucial to ensure your dog’s well-being and a positive nail trimming experience. By checking for discomfort, monitoring their behavior, and rewarding good behavior, you can help your dog feel comfortable and maintain healthy nails. Now that you have learned the essential steps for aftercare, you are well-equipped to provide optimal care for your furry friend.
Maintaining a Routine for Healthy Dog Nails
To ensure the overall nail health of your dog, it is crucial to establish a regular nail trimming schedule. Regular nail trims help prevent discomfort, pain, and potential injuries caused by overgrown nails. By following a consistent routine, you can keep your dog’s nails healthy and well-maintained.
When it comes to maintaining a routine for healthy dog nails, consistency is key. Aim to trim your dog’s nails every 2-4 weeks, depending on their individual nail growth rate. By monitoring their nails regularly, you can determine the ideal frequency for trimming.

One helpful tip is to associate the nail trimming session with a positive experience for your dog. Use treats and praise to create a rewarding atmosphere during the process. This positive reinforcement can make your dog more cooperative and less anxious during nail trims.
Additionally, it is essential to use the right tools for nail trimming. Invest in high-quality clippers or a nail grinder that suits your dog’s needs. This will ensure a safe and effective trimming session.
Remember to take it slow and be patient. Gradually introduce your dog to the nail trimming process, allowing them to get comfortable with paw handling and the presence of the clippers or grinder.
Maintaining a routine for healthy dog nails can prevent common nail-related issues and contribute to your dog’s overall well-being. Stay consistent, use positive reinforcement, and prioritize your dog’s comfort and safety during the nail trimming sessions
FAQs on how to cut dog nails
How do you cut a dog’s nails for beginners?
Cutting a dog’s nails for beginners involves preparing your dog, using the right tools, and following a step-by-step process. It’s important to be gentle and take it slow to avoid cutting the quick.
Do dog’s nails hurt when cut?
If the nails are cut properly, they shouldn’t hurt. However, cutting into the quick can cause pain and bleeding. It’s important to be cautious and take your time when trimming your dog’s nails.
How can I cut my dog’s long nails at home?
To cut your dog’s long nails at home, you will need nail clippers or a nail grinder specifically designed for dogs. Ensure your dog is comfortable, and start by trimming a small amount at a time, avoiding the quick.
Can I cut my dog’s claws myself?
Yes, you can cut your dog’s claws yourself if you are comfortable and confident in doing so. Make sure to use the right tools and follow proper techniques to ensure a safe and stress-free experience.
Can I use human nail clippers on my dog?
It is not recommended to use human nail clippers on your dog. Dog nail clippers are specifically designed to accommodate the size and shape of dog nails. Using human nail clippers can result in injury or discomfort for your dog.
Is it safe to cut dog nails at home?
Cutting dog nails at home can be safe if done correctly. However, proper knowledge of the dog’s nail anatomy, tools, and techniques is important to avoid causing pain or injury. If you are unsure, it’s always best to consult a professional groomer or veterinarian.